
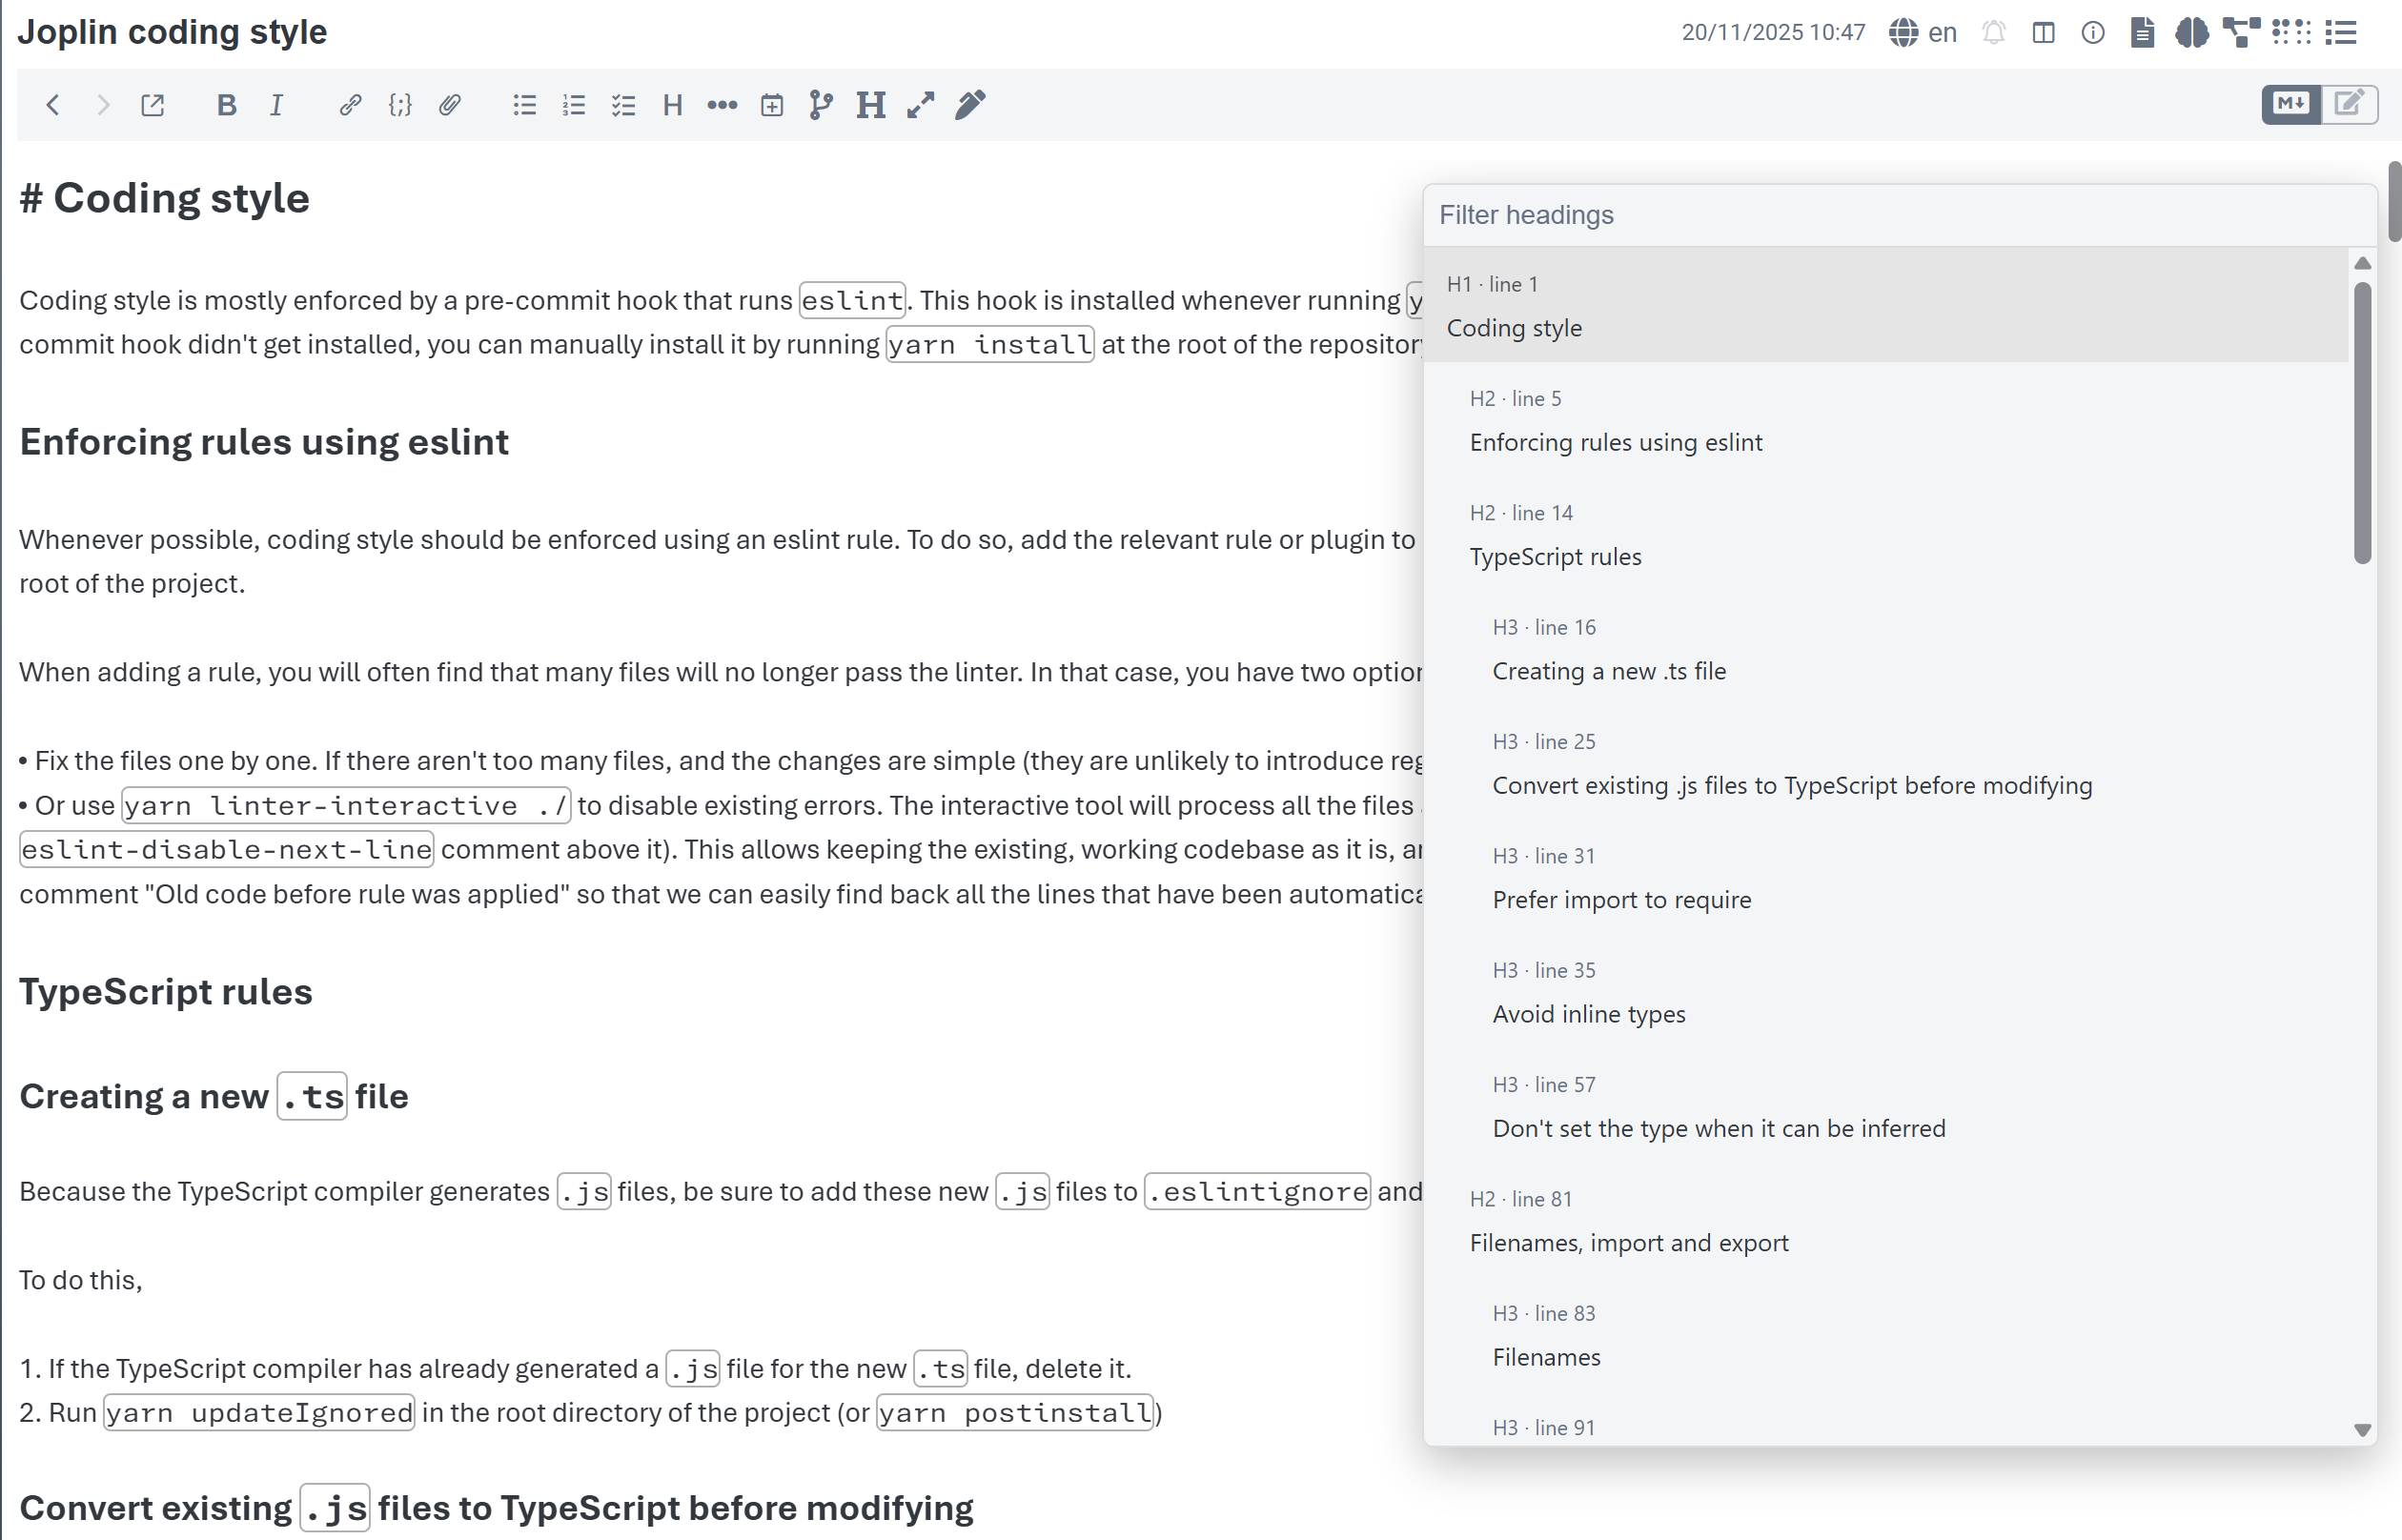
VS Code/Sublime text style overlay panel to navigate through headings in the markdown editor
| Links: | |
|---|---|
| Maintainers: | bwat47 |
| Version: | 0.6.3 |
| Minimum app version: | 3.3 |
| Downloads: This version: | 120 |
| Last updated: | 2026-02-27T17:44:03Z |
[!important] My coding knowledge is currently very limited. This plugin was created entirely with AI tools, and I may be limited in my ability to fix any issues.
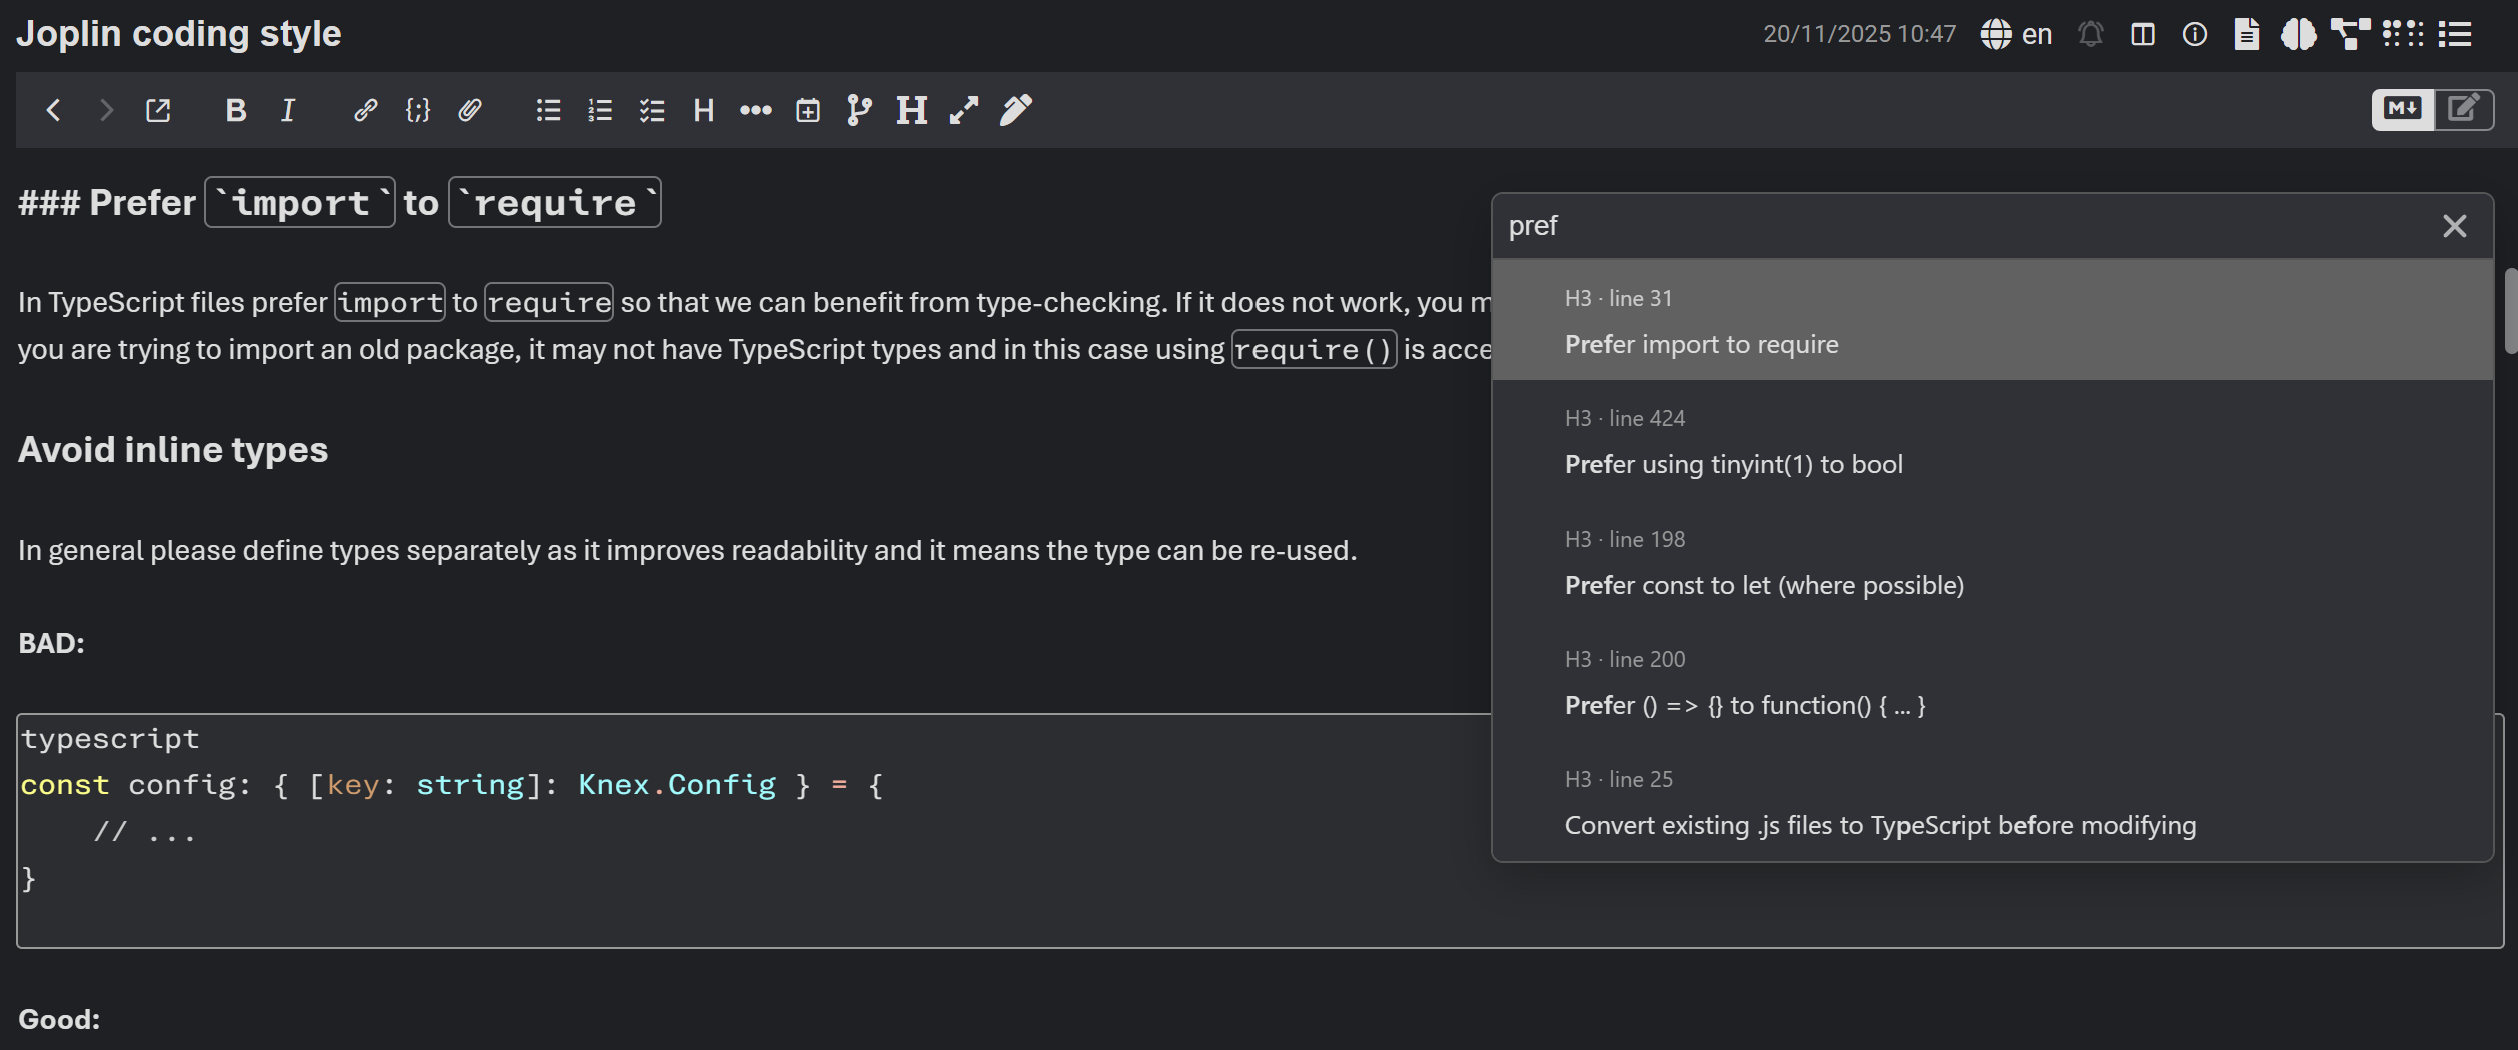
A Joplin plugin that provides a simple overlay panel allowing you to navigate and filter headings in the markdown editor, inspired by sublime text's "go to symbol" function.
[!important] This plugin only works in the markdown editor (editor view or split view). It does not work in the reading view or in the rich text editor. Codemirror 6 only, legacy editor is not supported.
In the markdown editor, click the Heading Navigator toolbar button, or use the assigned keyboard shortcut.
[!note] There isn't a default keyboard shortcut, you can assign one under Tools | Options | Keyboard Shortcuts | "Go to Heading" command.
You can navigate through headings using tab key (goes to next heading), shift tab key (goes to previous heading), arrow keys, or by scrolling and selecting a heading.
When selecting a heading with the keyboard, the editor will immediately scroll to the selected heading. Hitting enter in the dialogue (or clicking somewhere else) will close the dialogue. Hitting escape will close the dialogue & return to your original scroll/cursor position.
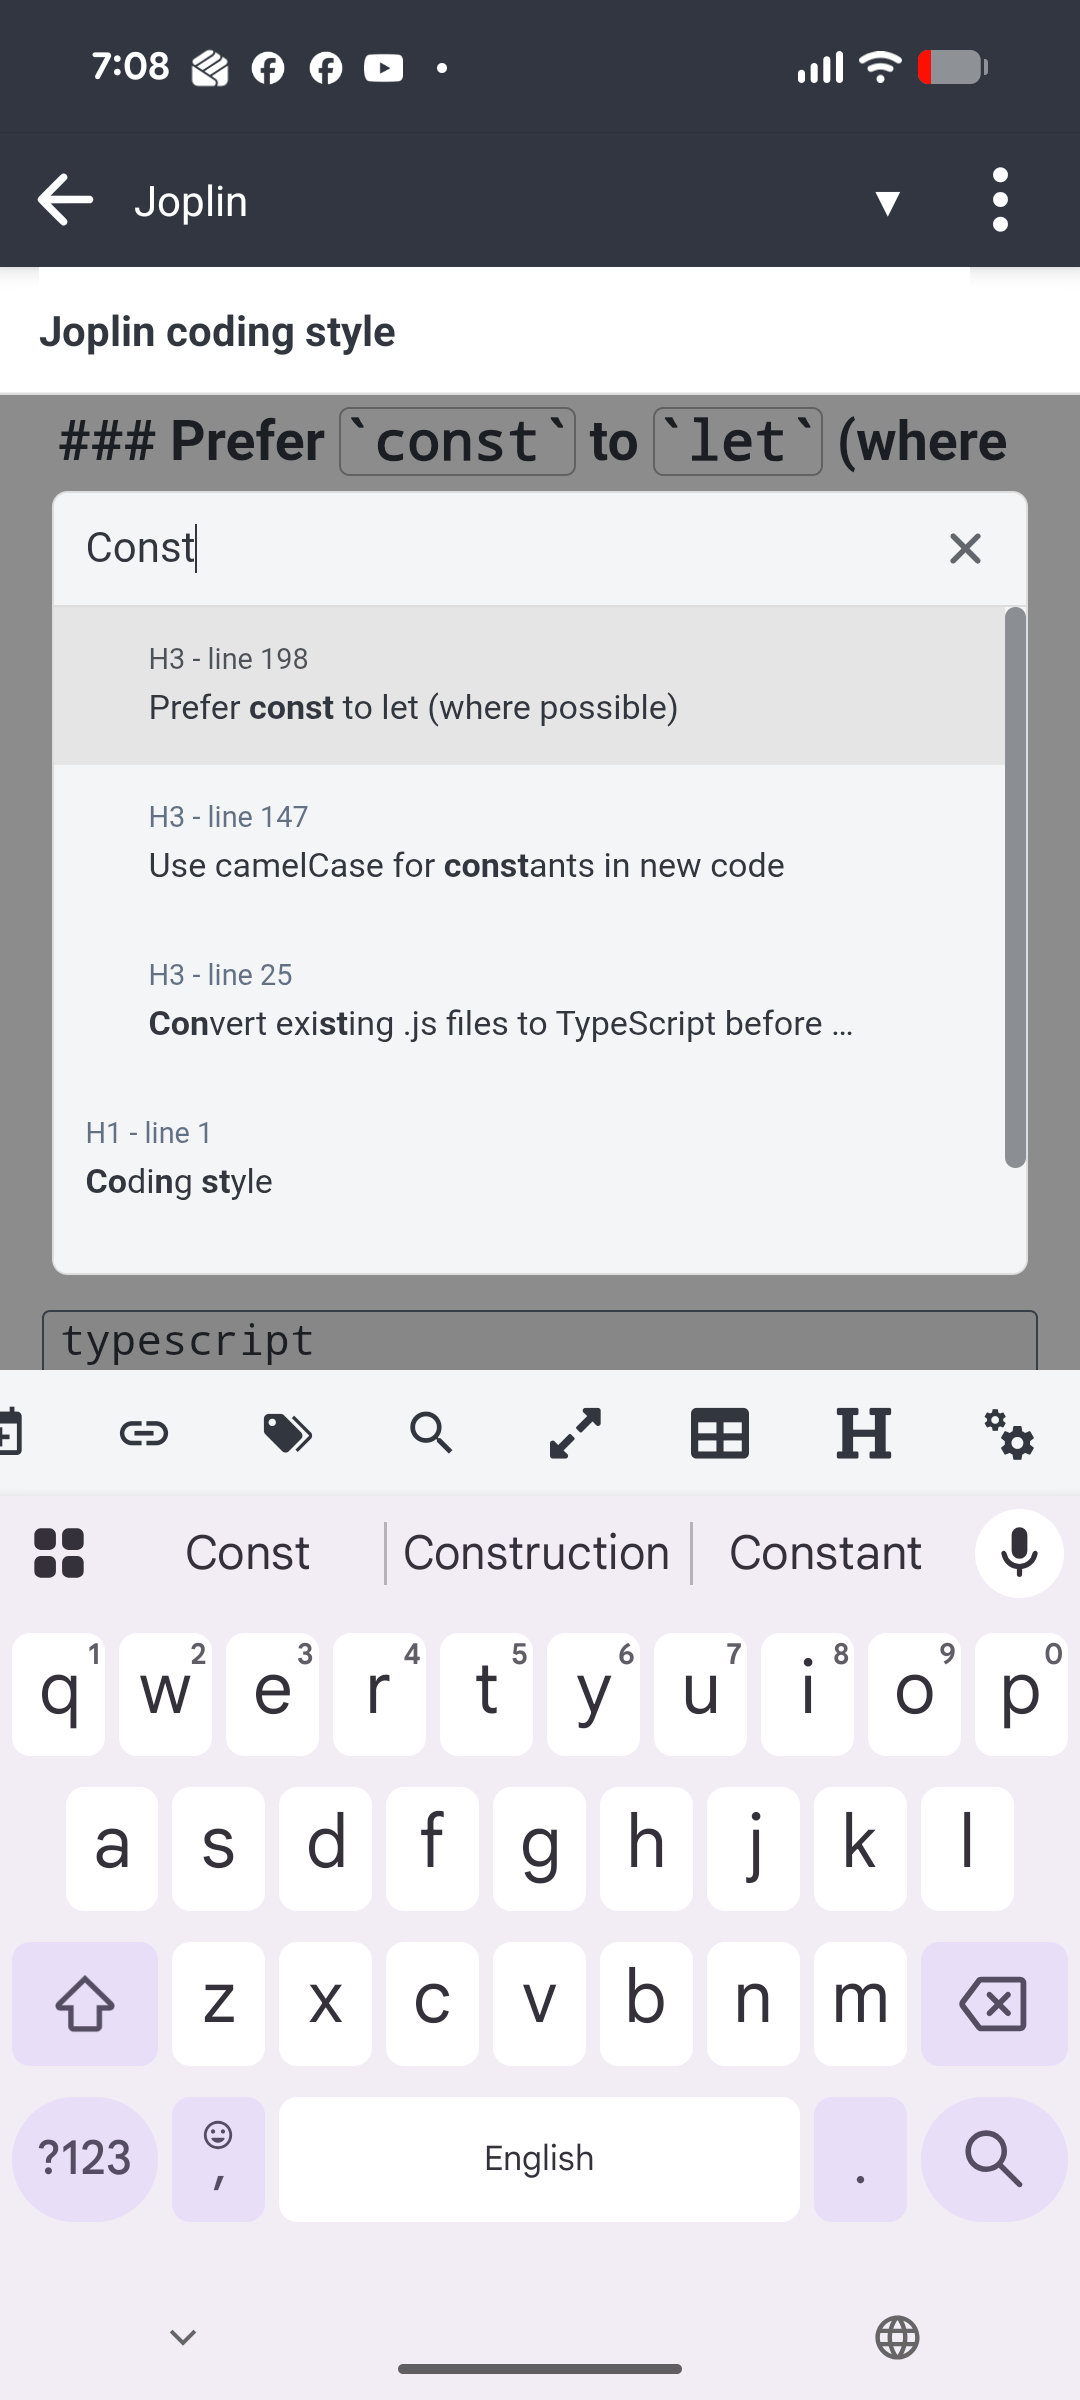
You can filter the list of headings using the search filter at the top of the panel.
The panel appearance can be customized via Settings | Heading Navigator (desktop only):
H# - line # metadata and reduce heading row height (default: off)
Settings take effect the next time the panel is opened.
The plugin can be accessed via the toolbar icon in the editing toolbar in the markdown editor.
On mobile, the panel has a responsive design and appears centered with faded background.
On mobile, the copy link icon is hidden, and instead long-press on a heading will copy link.