Drawing tool

![]()
![]()

Joplin supports inserting and editing drawings. On mobile, this is built in. On desktop, this is supported through the Freehand Drawing plugin.
Core features
- Inserting and manipulating drawings, images, and plain text.
- Drawing with a stylus and/or touchscreen.
- Embedding multiple drawings in the same note.
- A very large zoom range
On mobile
Adding a drawing

Clicking "Draw picture" adds a new drawing to the note. When Joplin's note viewer is open, drawings are added to the end of the note. In editing mode, drawings are added at the cursor.
Video tutorial
Watch this short video to learn how to add a drawing to a note on mobile app:
Editing an existing drawing
Existing drawings can be opened and edited from the note viewer.

On desktop
With the Freehand Drawing plugin, the UI for adding and editing drawings on desktop is slightly different.
Here, the "insert drawing" button is part of the main editor toolbar:
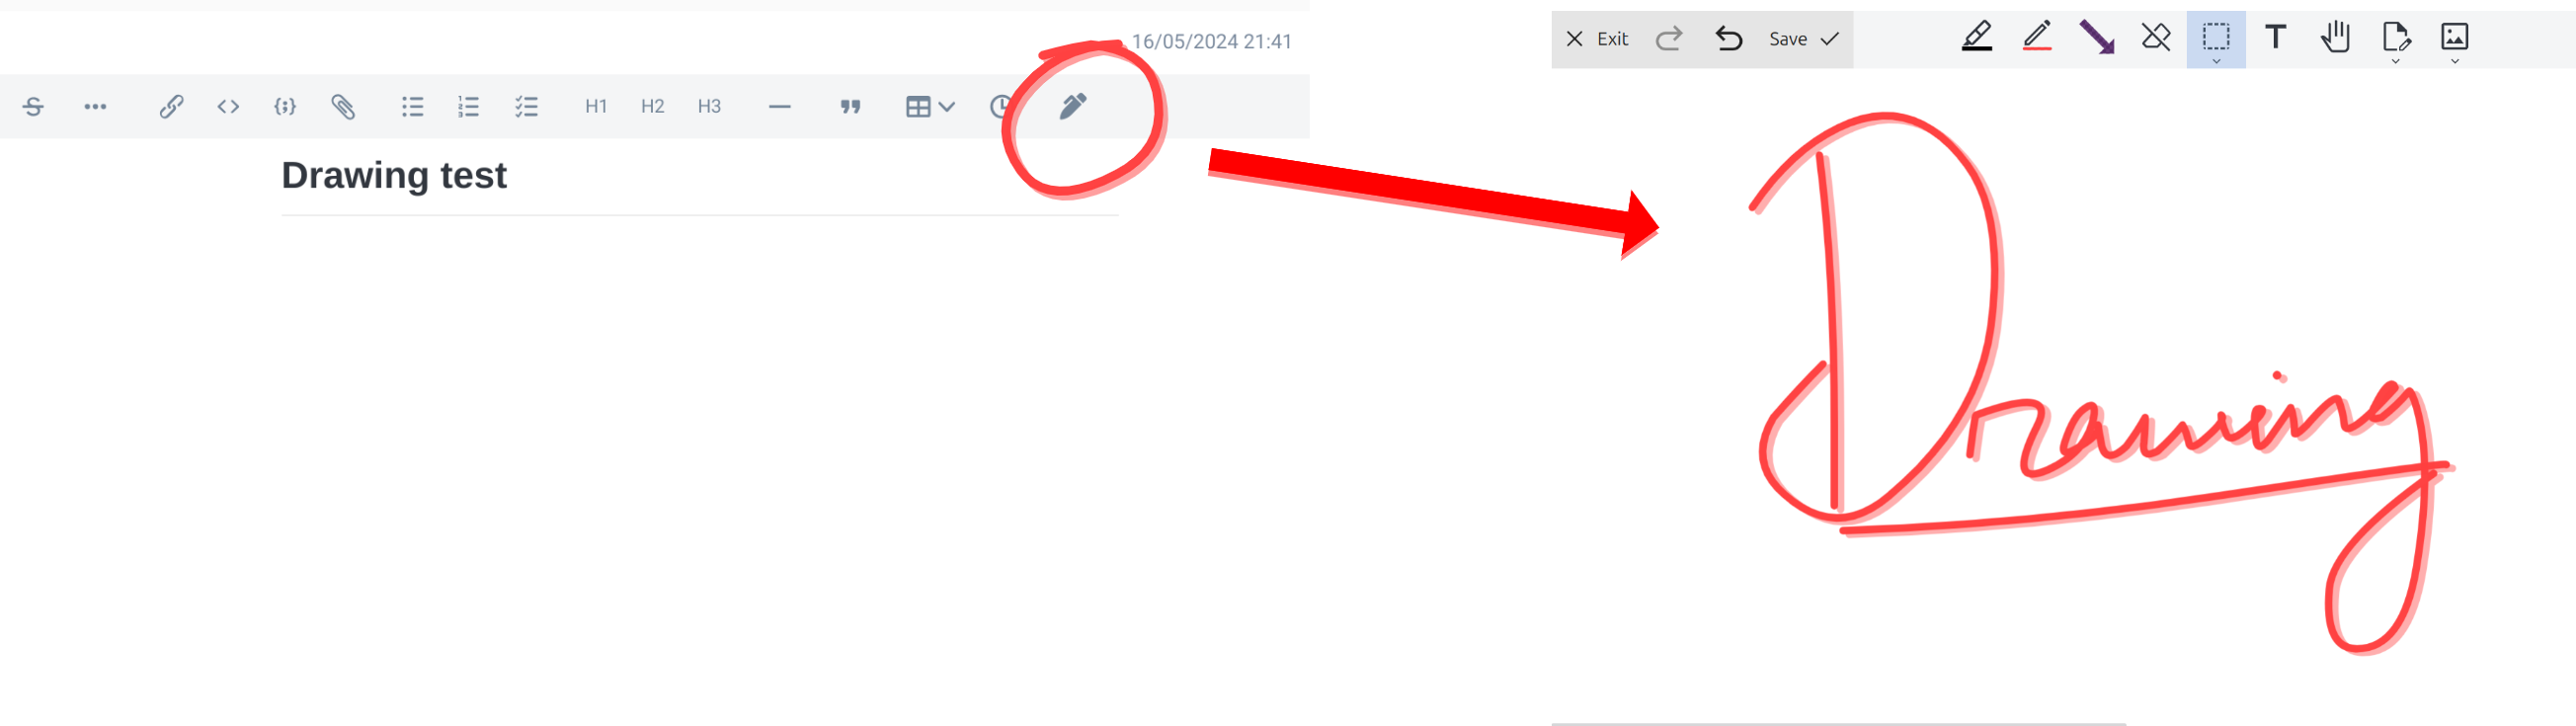
Double-click on an existing drawing to edit it:
For more ways to edit existing drawings on desktop, see the Freehand Drawing plugin's FAQ.
Video tutorial
Watch this short video to learn how to add a drawing to a note on the desktop app.

The editor
Save, undo, and exit

Actions for managing changes are at the top of the screen:
- Close: Hides the editor. If there are unsaved changes, this gives the option to save or discard them.
- Save: Save changes to the drawing, without closing the editor.
- Undo: Reverts the last change to the drawing.
- Redo: Redoes an undone change.
Long-pressing on a toolbar button shows a brief description. For example, long-pressing on the undo button shows "undo":

Tools
Clicking on an unselected tool switches to that tool. Clicking an already-selected toolbar button allows changing that tool's settings:

Most tool menus have a help button (![]() ) that shows additional information about the different available settings.
) that shows additional information about the different available settings.
How are drawings saved?
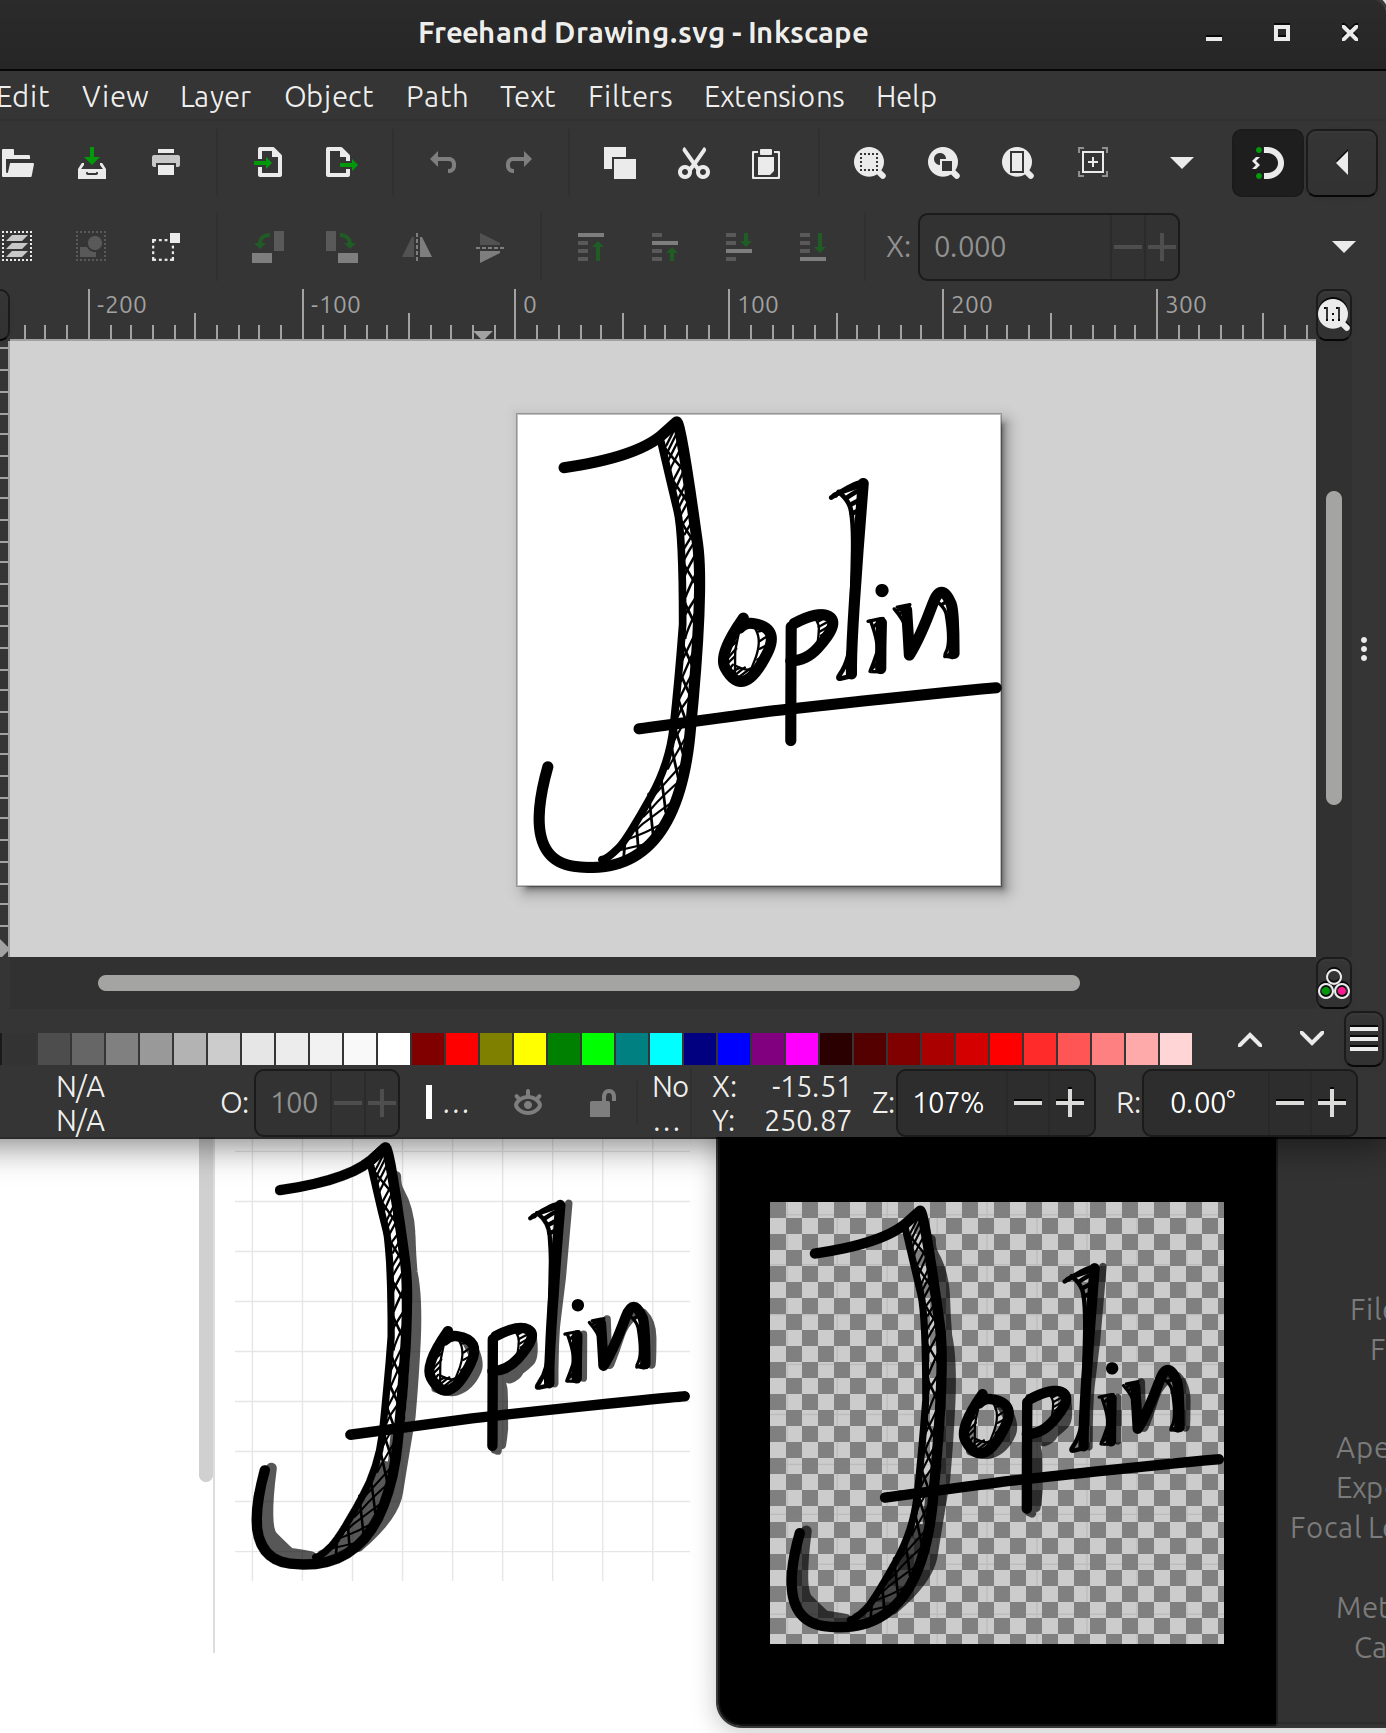
Drawings are saved as Joplin resources using the SVG image format.
This means that it should be possible to view and/or edit drawings in other apps that support SVG:
Other features
Large zoom range
The drawing tool has a very large zoom range by default. Among other things, this can be used to provide additional details or clarification to notes.
Locking rotation and disabling touch drawing
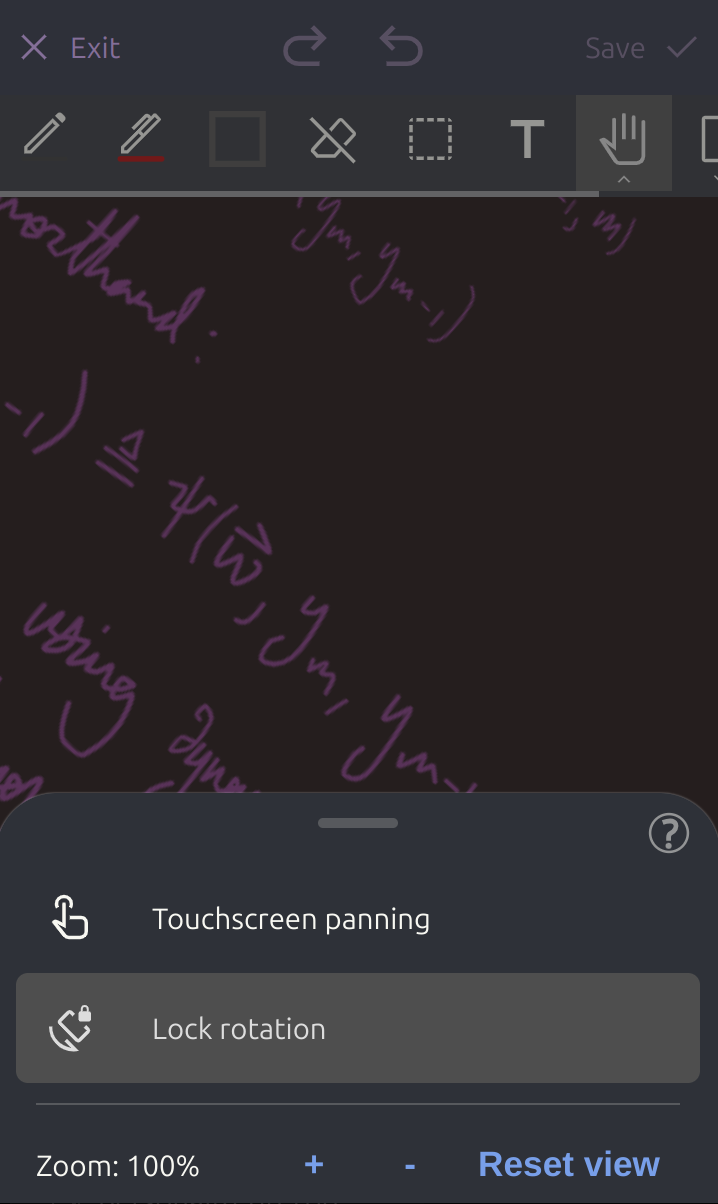
The "hand" tool's settings include:
- Rotation locking: By default, touch gestures can rotate the screen. Rotation locking prevents the screen from rotating.
- Touchscreen panning prevents the touchscreen from drawing. Instead, all touch gestures move the screen. This is particularly useful on tablets with a stylus.
Picking a color from the screen
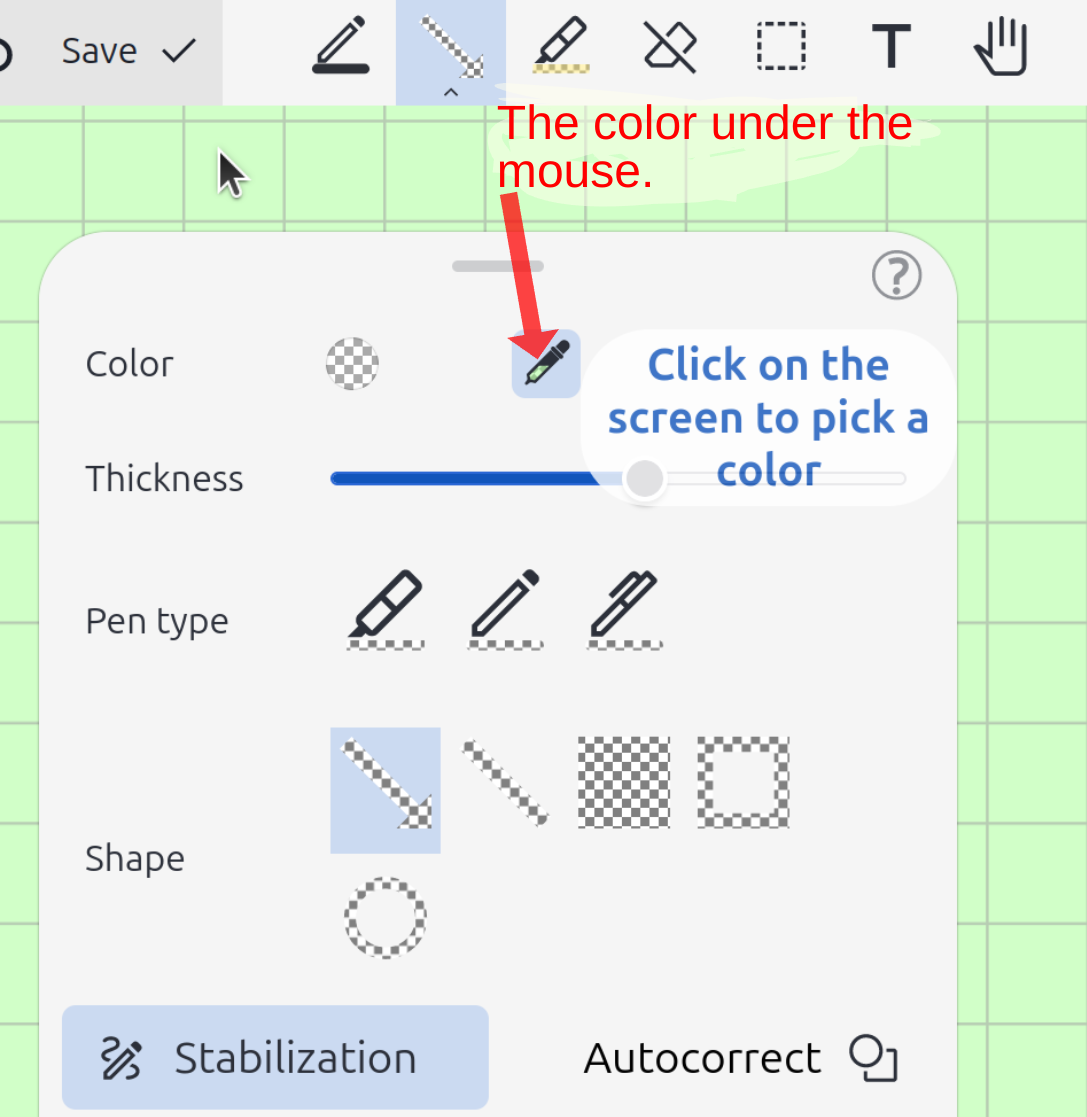
Color pickers include a "pick color from screen" tool:

This tool allows setting the current pen, text, or selection color to a color displayed on the screen.
It's also possible to click and drag with this tool. While doing this, the interior of the color dropper shows the color below the cursor:
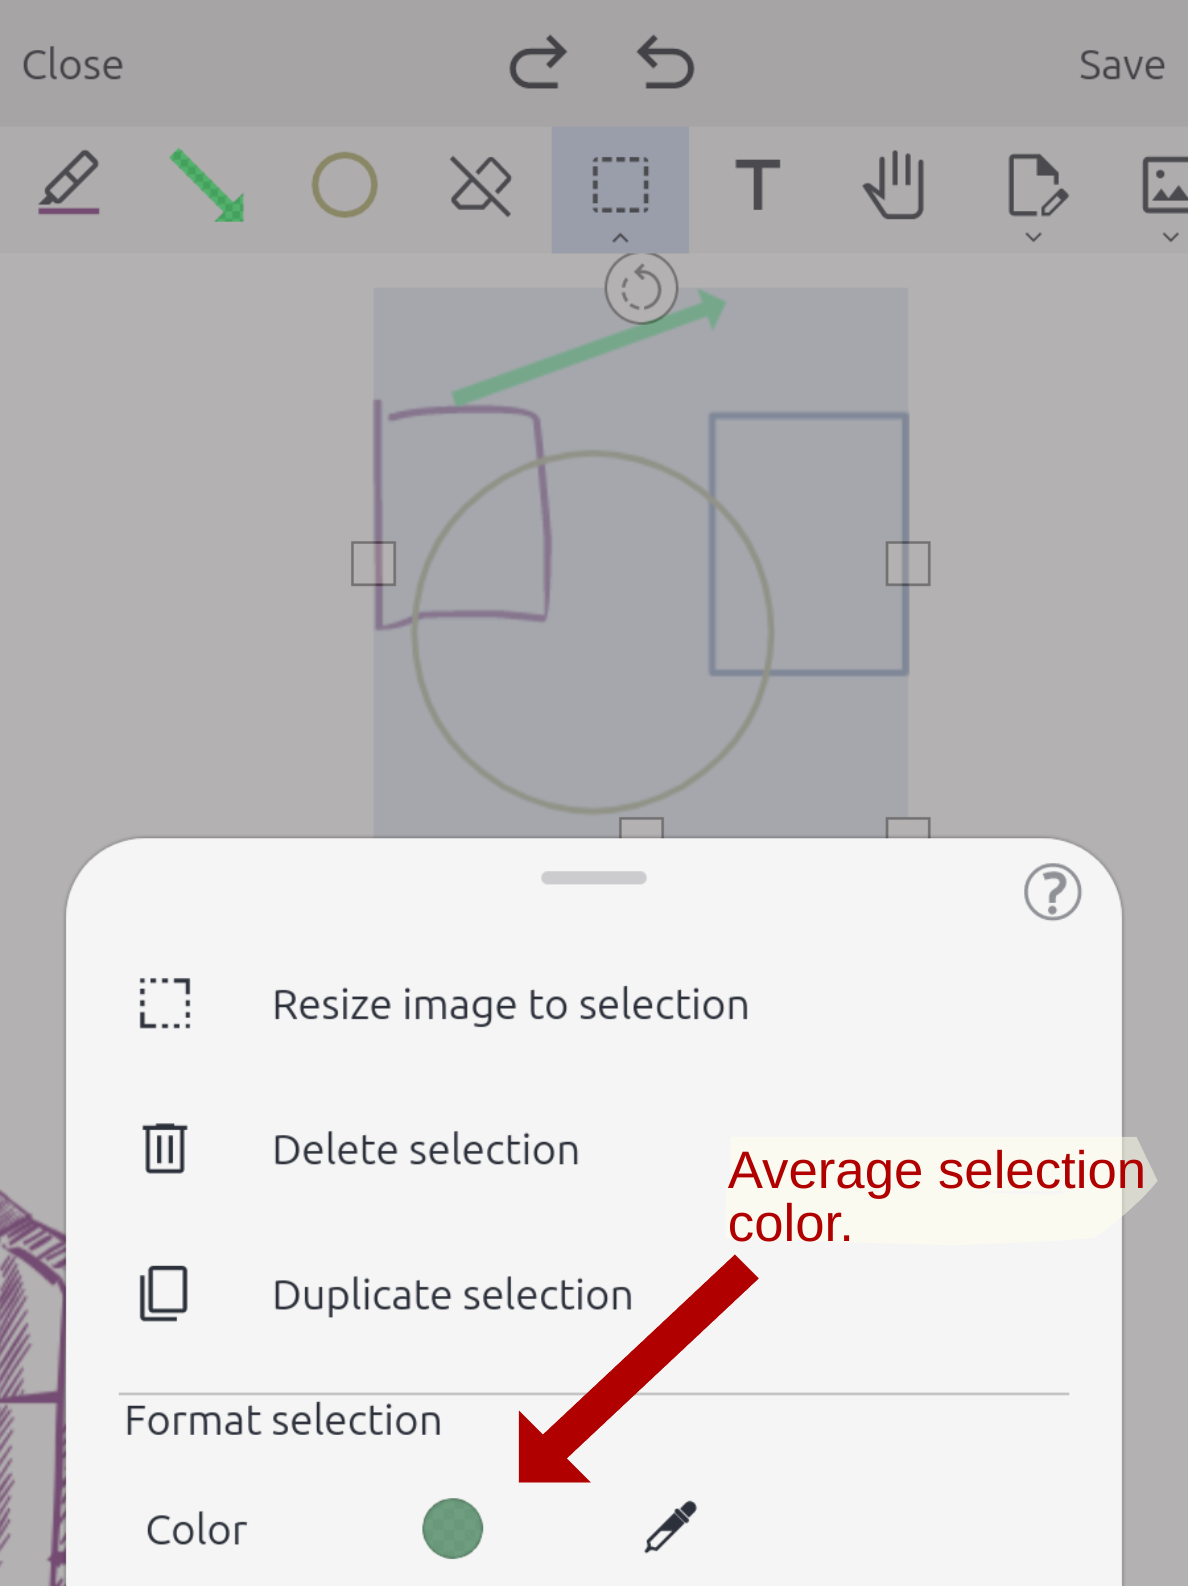
Changing the color of selected items
After selecting content with the selection tool, the selection tool menu allows duplicating, deleting, and changing the color of the selection:
Keyboard shortcuts
On desktop and mobile devices with keyboards, the following keyboard shortcuts are available:
- 1, 2, 3, ...: Change the selected tool.
- space: Open the configuration menu for the selected tool.
- ctrl-z, ctrl-shift-z: Undo and redo.
- Changing the selection
- ctrl-d: Duplicate selected items.
- end: Move selection to back.
- i, o, shift-i, shift-o: Stretch the selection vertically or horizontally.
- r, shift-r: Rotate the selection.
- ctrl-a: Select all.
- shift-click and drag: Expand the selection.
- Changing the pen style
- alt-1, alt-2, ...: If a pen tool is selected, change the style of the selected pen.
- +, -: Increase or decrease the size of the selected pen.
- Moving around the image
- ctrl-f: Find text and images.
- w: Zoom in.
- s: Zoom out.
- Arrow keys: Move left/right/up/down.
- r, shift-r: Rotate the viewport.
- Drawing
- shift-drag: Plane lock
- ctrl-drag: Snap to grid
- ctrl-s: Save
- alt-q: Close (Desktop only)
On MacOS and iOS, in most cases, both ctrl and the command key will trigger the above shortcuts.
Changing the part of a drawing shown in the note viewer
It's possible to change which part of a drawing is visible in the note viewer using the selection and page menus:
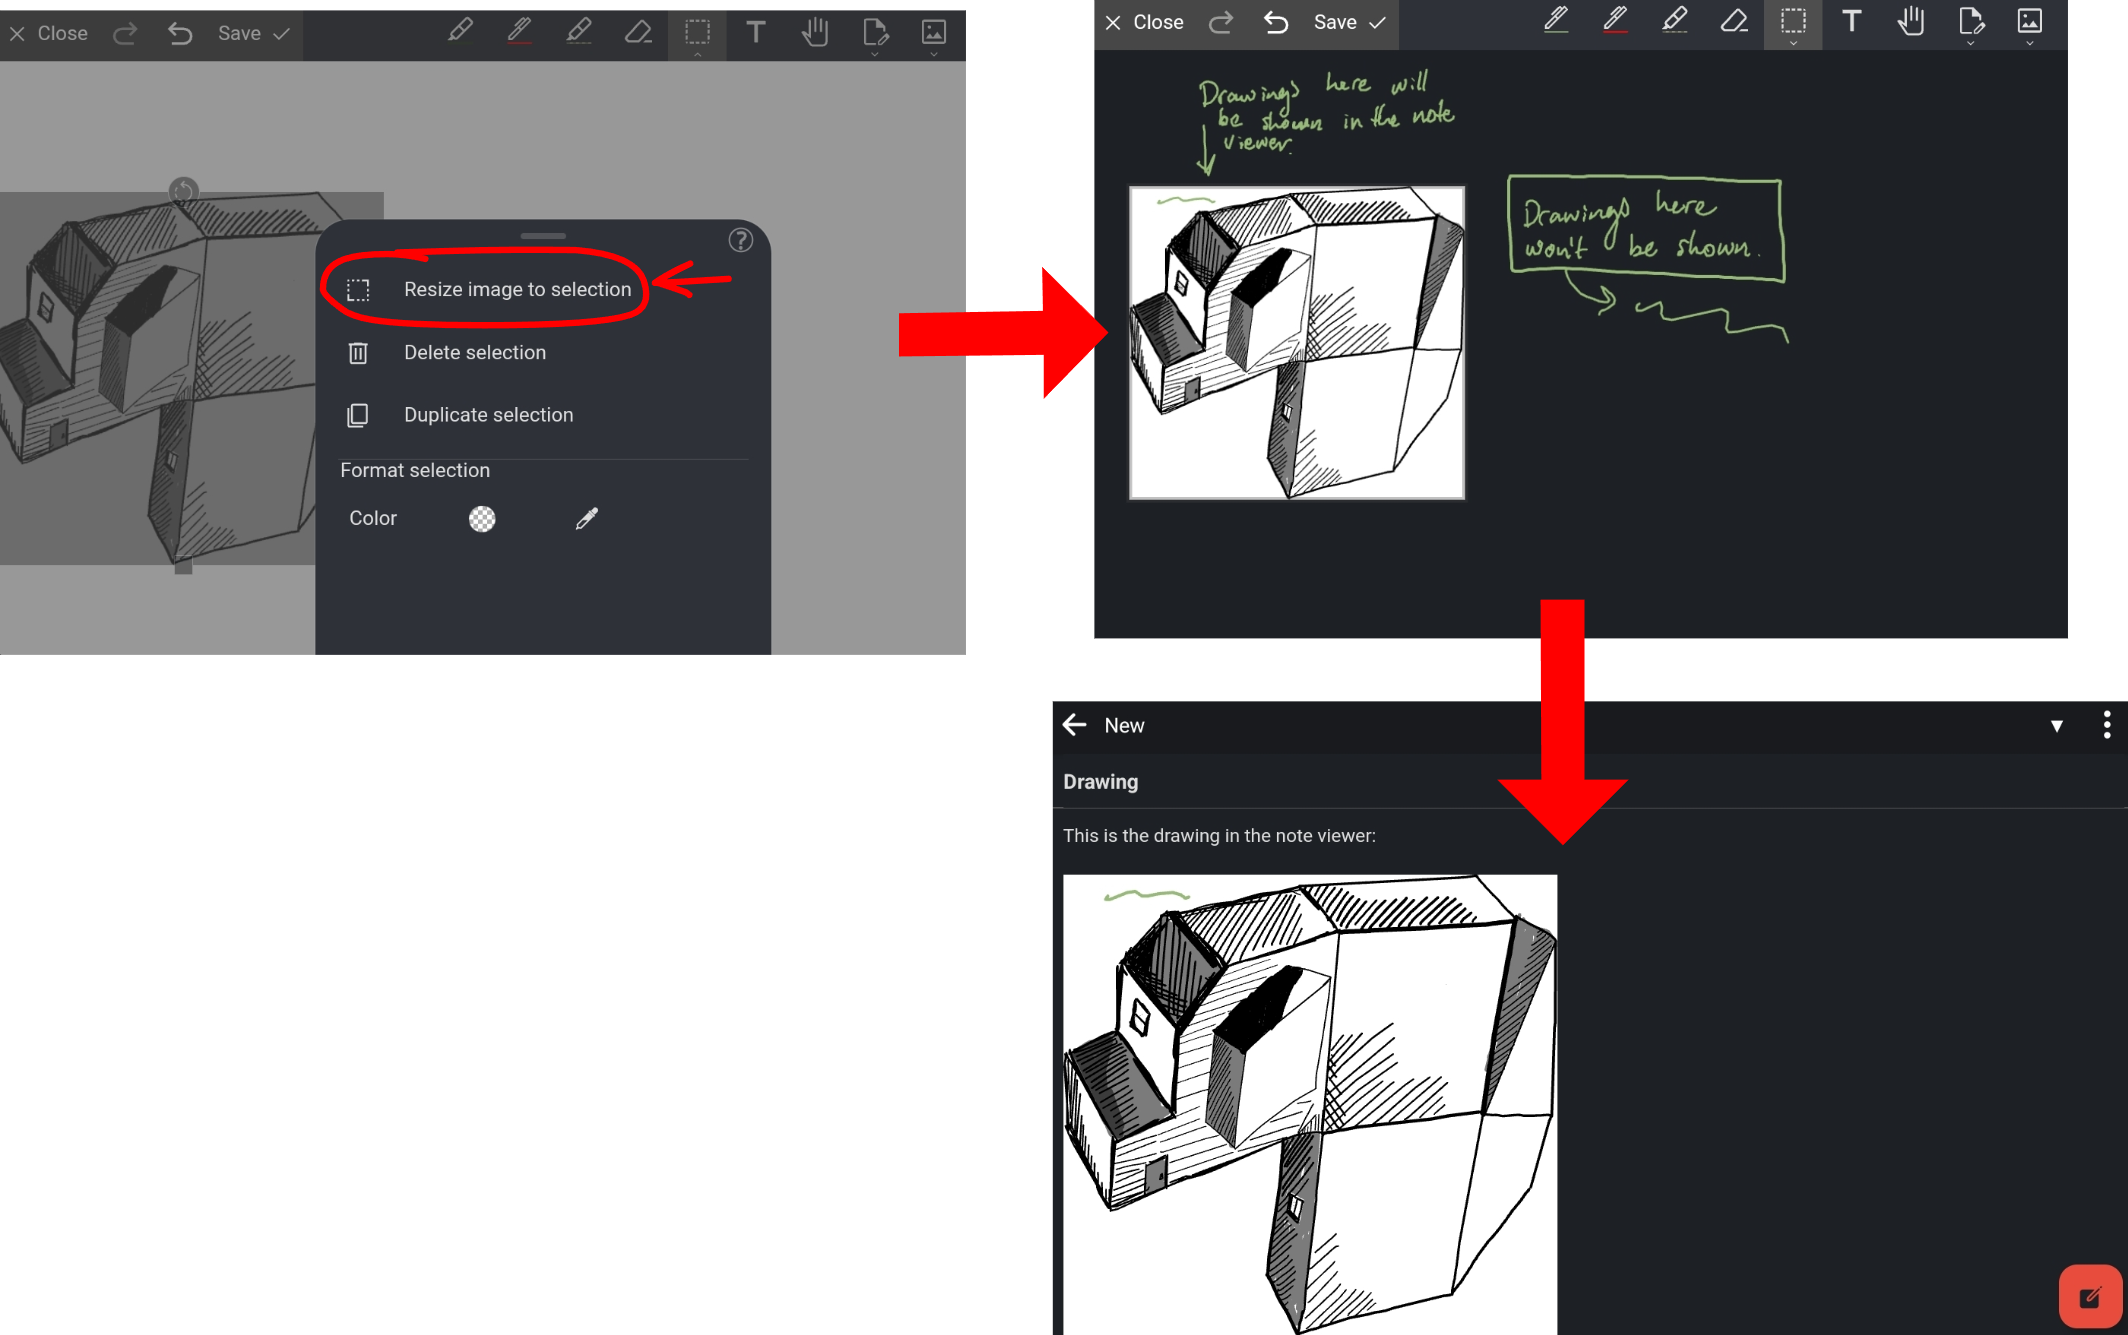
When opening the note viewer again, the image will be cropped to the region selected above.
To un-crop an image, use "Auto-resize" in the "page" menu:
