Optical Character Recognition (OCR)
Optical Character Recognition (OCR) involves transforming an image containing text into a format that a machine can interpret. When you scan a text document, the computer stores it as an image file, preventing direct text editing or searching. OCR allows for the conversion of the image into text.
Enabling OCR
OCR should be enabled by default. If it is not you can enable it from the Configuration screen, under the "General" section. Once you do so, Joplin is going to scan your images (PNG and JPEG) and PDF files to extract text data from it.
Scanning documents is only available on the desktop app since this is a relatively resource-intensive process. The mobile app will have access to that OCR data via sync.
For now OCR is reliable when scanning printed text, PDFs in particular, or images where the text is clear such as screenshots. We do not currently support handwritten text, and text on photos may or may not be recognized depending on how clear it is.
Searching
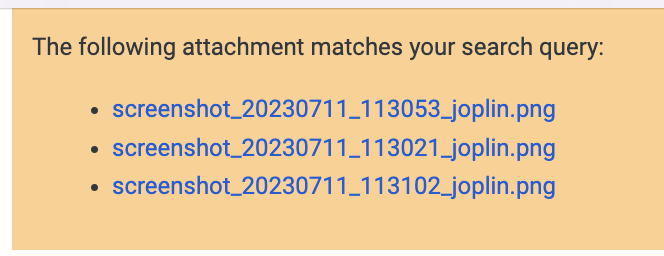
When you search, the application will be able to tell you what notes but also what attachments match the query. In this case, a banner will be displayed at the top of the note that contains the attachment(s):

Searching in OCR text is enabled on the desktop and mobile app.
Viewing OCR text
The application allows you to view the OCR text associated with an image. To do so, right-click on a PDF link or image and select "View OCR text". This will create a new text file with that OCR text, and open it in your text editor.

Initial processing
Processing images and PDF may be resource intensive, especially if you have a lot of attachments. So the first time the feature is enabled don't be surprised if Joplin CPU usage is higher than usual. Once the initial scan of all your attachments is done, this will go back to normal. Later, whenever you attach a file it will be scanned quickly in a way that's not noticeable.
Offline first
As always, Joplin is offline first which means OCR too happens offline without the need for an internet connection and, more importantly, without the need to upload your private data to a third party cloud. The drawback is the aforementioned initial use of your computer's resources, but we believe this is worth it to enable full offline support.
Pluggable system
OCR is a technology that evolves rapidly especially with the recent advances in AI and large language model (LLM) in particular. As such Joplin OCR is designed to be pluggable. We will monitor the existing open source OCR technologies and may switch to a different one if it makes sense, or provide support for multiple ones.
Additionally in some cases it may make sense to use a cloud-based solution, or simply connect to your self-hosted or intranet-based server for OCR. The current system will allow this by writing specific drivers for these services.
This pluggable interface is present in the software but not currently exposed. We will do so depending on feedback we receive and potential use cases. If you have any specific use case in mind or notice any issue with the current OCR system feel free to let us know on the forum.
Custom OCR language data URL
After enabling OCR, Joplin downloads language files from https://cdn.jsdelivr.net/npm/@tesseract.js-data/. This URL can be customized in settings > advanced > "OCR: Language data URL or path". This URL or path should point to a directory with a .traineddata.gz file for each language to be used for OCR. After the first download, language data files are cached.
For example, to use OCR on a computer without internet access:
- Transfer the
.traineddata.gzfiles for the languages that will be OCRed.- English: https://cdn.jsdelivr.net/npm/@tesseract.js-data/eng/4.0.0_best_int/eng.traineddata.gz
- French: https://cdn.jsdelivr.net/npm/@tesseract.js-data/fra/4.0.0_best_int/fra.traineddata.gz
- In general, trained data can be obtained from
https://cdn.jsdelivr.net/npm/@tesseract.js-data/[language]/4.0.0_best_int/[language].traineddata.gzwhere[language]should be replaced witheng,fra,chi_sim,deu,spa, or one of the other supported language codes.
- Transfer the
.traineddata.gzfiles to the offline computer. - Move all of the files to the same directory (e.g.
C:\Users\User\Documents\joplin-ocr-data\). - In Joplin, open settings > general > advanced.
- Set the "OCR: Language data URL or path" to the filepath of the directory with training data.
- This should be the path to the directory selected in step 3.
- Click "Apply".
- Enable OCR.
To replace existing cached language data, click "Clear cache and re-download language data files".


